Apple’s AirPods Pro 2 are still among the best wireless earbuds, even a year and a half after their release. Indeed, Apple has added many new features in iOS 17, such as adaptive audio, conversation awareness, and custom volume. We might see even more AirPods Pro 2 features announced at Apple’s Worldwide Developers Conference on June 10.
In the meantime, there are plenty of lesser-known AirPods Pro 2 features you can try right now. I’ve been using the AirPods Pro 2 since their launch, both the original model and the “new” version with USB-C charging that arrived with the iPhone 15.
The best part? Some of these tips will work with earlier versions of AirPods and even AirPods Max earbuds. Just make sure you’ve updated to the latest version of iOS 17.

These are just some of the options you can access in the Hearing option in Control Center.
Hidden Control Center options
The Control Center is a quick way to access many AirPods settings. With your AirPods connected to your iPhone, hold down the volume slider and a list of options will appear below, such as noise control mode, conversation awareness, and spatial audio toggles.
But you can add much more to Control Center in just two simple steps. First, add the Audition option by going to Settings > Control Center. Then go back to Settings > Accessibility > Hearing Control Center and tap the green plus icon next to any or all options, like background sounds and live listening. Background sounds play rain, ocean, and other sounds like white noise through your headphones to help you focus. You can learn more about the Live Listen feature below.
Now, swipe down to open Control Center again and you should see the Hearing icon which looks like an ear. You will be able to see the battery charge of your AirPods and control all the options you activated in the previous step, like Live Listen.
Listen live
Live Listen lets you amplify what your iPhone’s mic picks up and stream it directly to your ears with any AirPods model. This is primarily an accessibility feature, but you can potentially use it to listen to what’s going on in a neighboring room, for example as an audio-only baby monitor.
This feature also resides in the Hearing option in Control Center. Once you’ve enabled it, swipe down and tap the Hearing (ear) icon in Control Center, then tap Live Listen.

Look at this: Tips and tricks for AirPods Pro 2
Personalize audio with headphone accommodations
Want to change the default sound profile on your AirPods? If you use Apple Music, you can start by adjusting the equalizer by going to Settings > Music > EQ. Other streaming apps like Spotify have their own EQ tool that you can customize to your liking.
Apple’s headphone hosting options also allow you to fine-tune your audio even further. Go to Settings > Accessibility > Audio/Visual > Headphone Adaptation. Now you can choose between balanced sound, voice or brightness, or amplify soft sounds using the slider tool.
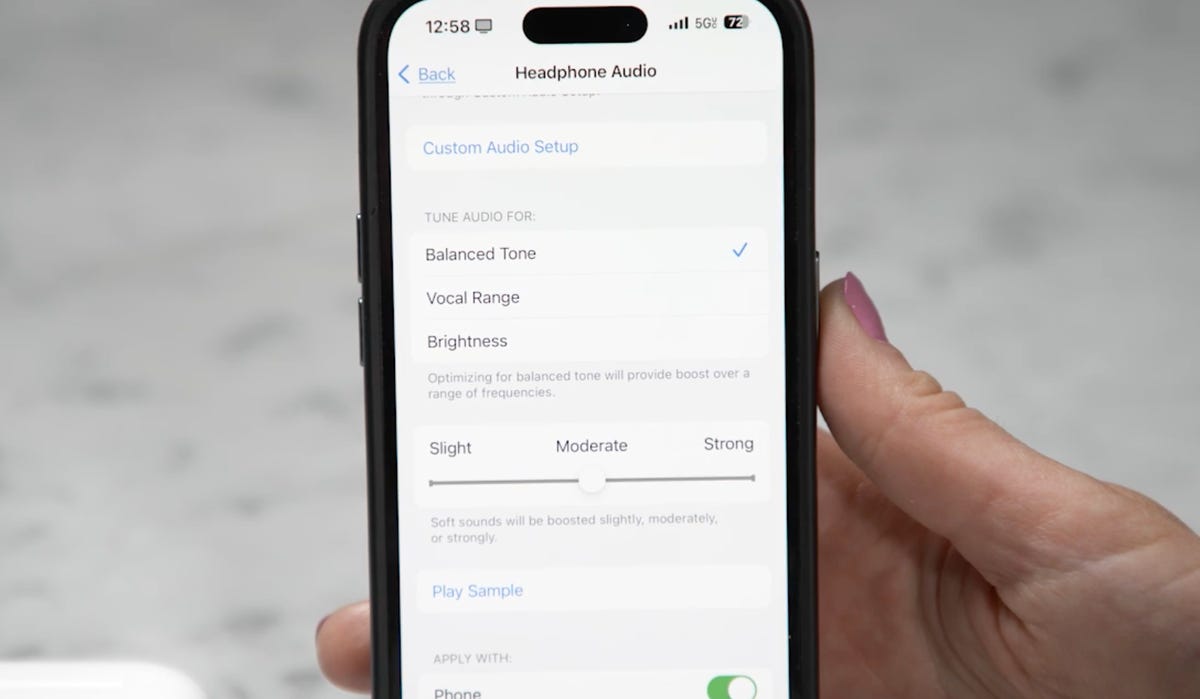
There are many settings to adjust in Headphone Accommodations.
You can also add a custom audio configuration in the Headphone Accommodations menu. Tap the custom audio option, then your AirPods will go into noise canceling mode and you will be asked if you can hear words spoken in a low voice. It will play two audio samples and you will choose the one you prefer.
Custom spatial audio
Your iPhone’s TrueDepth camera isn’t just for FaceID. You can actually use it to get personalized spatial sound tailored to the shape of your ears.
Go to Settings > AirPods > Custom Spatial Audio then follow the instructions to configure this. You’ll be asked to hold the phone in front of your face, then turn your head left and right to map your ears. Now, make sure spatial audio is enabled from Control Center and try it with supported movies and music.
Share audio with a friend
Remember the good old days of sharing music with a friend using wired headphones? This is version 2024. Swipe down to open Control Center, then tap the AirPods icon in the upper right corner of the music playback area. Tap Share Audio.
Bring another pair of AirPods or Beats nearby, open the cover, then press and hold the pairing button on the case. Follow the on-screen instructions to connect this other pair to your phone and you can listen to the same songs.
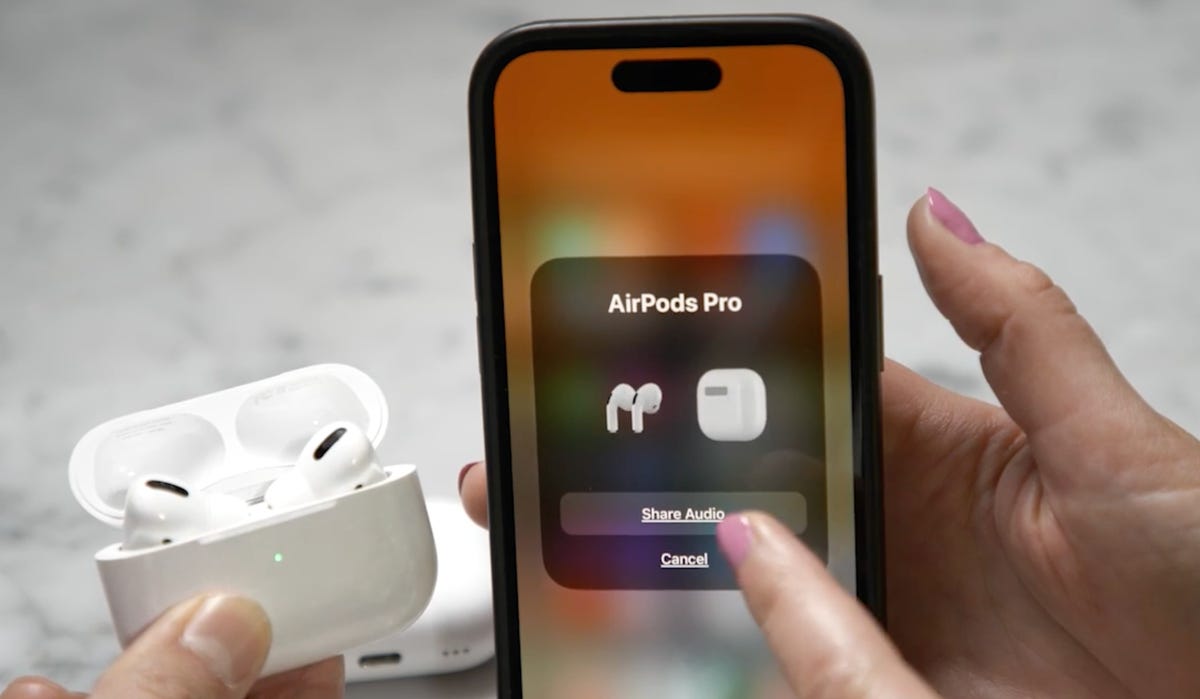
Connect another pair of AirPods Pro 2 to an iPhone to share audio.
Siri can describe images received in Messages
I recently discovered that Siri can describe Photos received in the Messages app when I’m wearing AirPods Pro 2 and my phone is locked. For example, one day I was waiting for a bus and Siri told me that my best friend had sent a photo of a brown dog lying on a black and white checkered floor. I took out my phone to check and Siri was spot on.
I haven’t found the magic trick that makes Siri do this with every photo, but so far it has worked on images of people and pets centered in the frame with a light background . I’ve contacted Apple for more information on this feature and will update this story with more details.
To try to reproduce this yourself, make sure “announce notifications” is enabled by going to Settings > Notifications > Announce notifications, and the Headset option is also enabled. Scroll down on this page to make sure the Messages app is enabled. Now, just ask a friend to send you a photo (texting and iMessages both worked for me) to see if it works!
Unlock more AirPods settings with the Shortcuts app
The Shortcuts app on iPhone is a powerful tool for getting the most out of your AirPods. One of my favorite shortcuts is to have the AirPods automatically switch to my preferred settings every time they connect to my iPhone: noise canceling mode at 40% volume.
First, make sure your AirPods are in your ears and connected to your iPhone. Open it Shortcuts app > Plus icon > Add action. Here you’ll want to search for “set noise control mode” and then tap the gray box that says “route.” Select the name of your AirPods from this menu, then choose your mode (in this example, it’s noise cancellation.)
Next, you’ll want to add another action. In the “Find apps and actions” bar, type “Set volume” and select it. Now change the volume to 40% (or whatever volume you want). Give your shortcut a catchy name and tap Do.
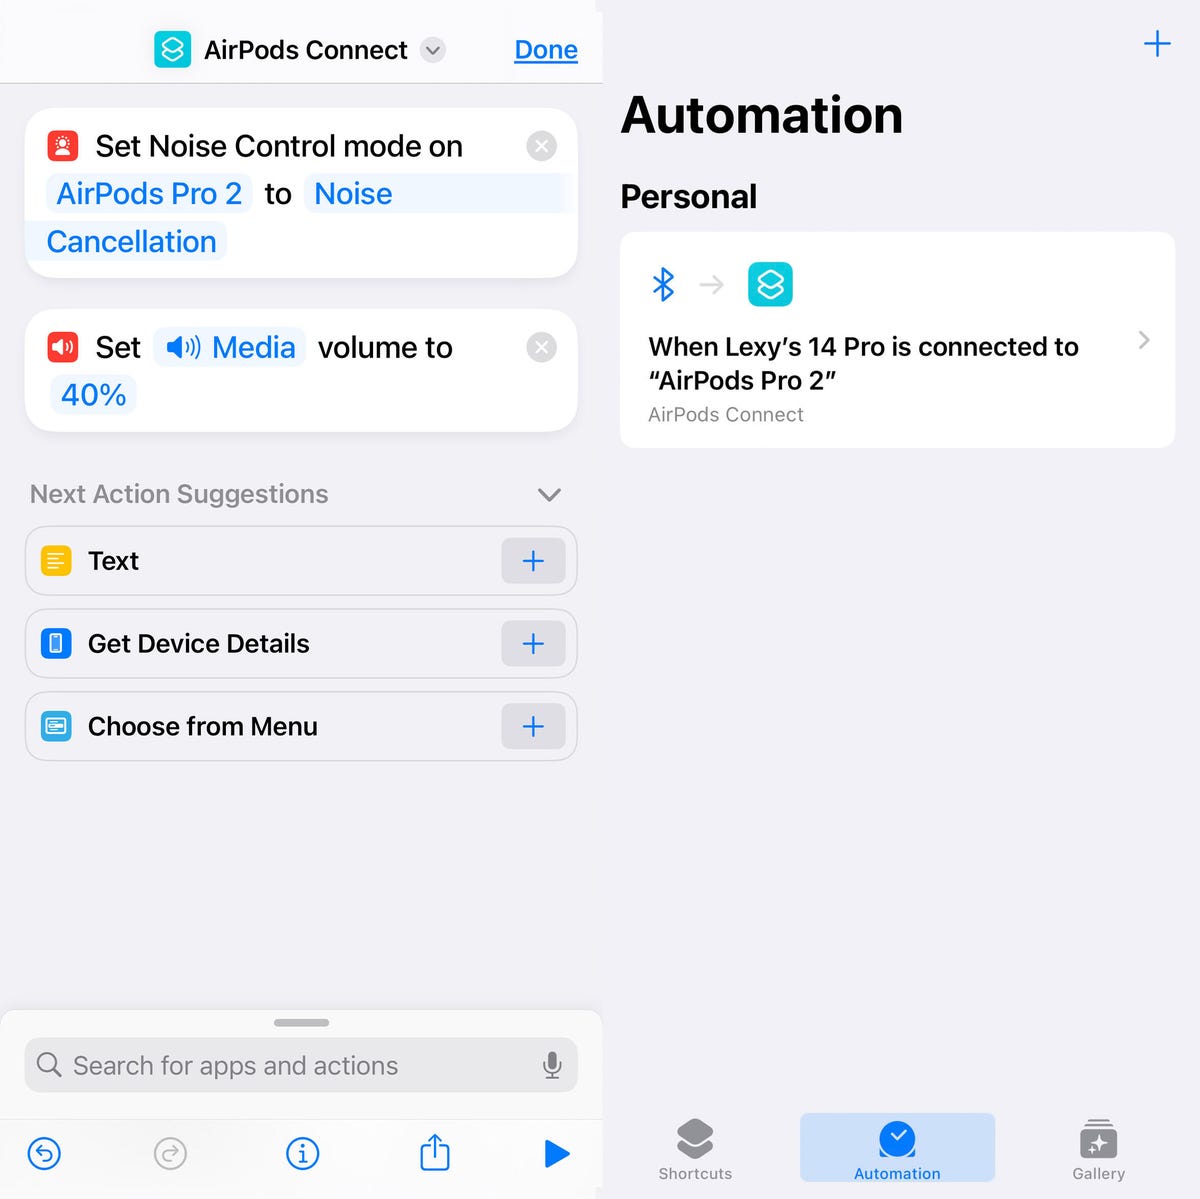
My custom shortcut (left) and automation (right).
Now let’s run this shortcut automatically when you put AirPods in your ears. Go to the Automations tab, tap New Automation and search for Bluetooth. Where it says device, find the name of your AirPods, make sure “is connected” is enabled, then “run immediately.” Tap Next, then choose the shortcut you just created. The next time you put your AirPods in your ears and they connect to your phone, this shortcut should run and you can test it.
You can learn more about Apple’s AirPods Pro 2 and how they differ from the AirPods 3 and check out all the rumored iOS 18 updates we might receive at Apple’s Worldwide Developers Conference in June.
News Source : www.cnet.com
Gn tech


